I’m a bit of a newbie when it comes to C# programming in it’s entirety, not just with Kinect development. So when it was announced Beta 2 was available I pounced unknowingly into the undocumented depths of version migration. While the Kinect for Windows team have done a fine job with the update, it’s just not that well documented for average Joes like me.
Beta 2 improves on Beta 1 by giving us a few performance enhancements. Key improvements include improved skeletal tracking accuracy and proficiency, as well as support for changes in the Kinect status (for example, unplugged, underpowered etc.) which will solve a great deal of problems from a user perspective.
So, after a bit of tinkering and such, I’ve upgraded my projects to the basics of Beta 2 and here’s how.
Download and Install the SDK
Download the updated SDK
Bit of an obvious one, this one. Go and download the official SDK from the fancy new Kinect for Windows website at KinectForWindows.org. They’ve made it pretty obvious where to download it from, just make sure you download the right version for your system.
Side note (one that I missed first time round) – if you use the Coding4Fun Kinect toolkit, you can grab the updated version of that over at CodePlex
BEFORE YOU INSTALL
Make sure you’ve:
- Unplugged your Kinect device from the USB port.
- Closed Visual Studio – or whatever other development tool – completely.
- Uninstalled previous versions of the SDK (and any third party drivers).
Install the SDK
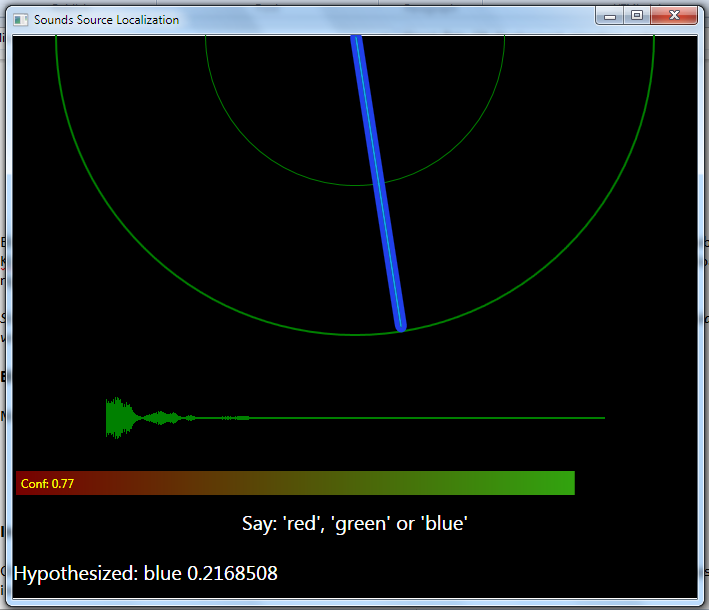
Once you’ve done all those steps, you can install the SDK as usual. The SDK comes with updated sample apps that include all the new functionality that comes with Beta 2. The Audio demo now has it’s own sample app, which is great and was one of the quickstarts that I found most interesting.
If you want to see what makes these sample apps tick, they have included a ‘Samples.zip’ folder within the SDK folder in the Start Menu for you to unzip somewhere and dive into. Just be aware it’s not going to let you unzip the contents in it’s current location, so just make a new folder on your desktop.
If you’re using Coding4Fun, make sure you’ve extracted and saved the contents of the downloaded .zip file somewhere save. We’ll be sorting out this in a second. If you save over the original files, it will actually save you from doing the steps later on.
Migrating projects
This bit isn’t particularly difficult. Your current code should work with Beta 2, just that the way of doing things has been tidied up. But before we do that, there’s a bit of housekeeping to do…
Update your Resources
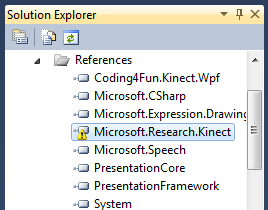
Inside Visual Studio, you’ll be used to your Solution Explorer. Inside your References folder, though, you might not be. It’s here where you imported the important bits for the Kinect SDK to work in the first place. You’ll note that now ‘Microsoft.Research.Kinect’ has a little error notification on it, simply because V1.0.0.0 isn’t there any more.
If you’re using Coding4Fun, then feel free to delete that entry, too. It won’t have an error notification on it if it’s still in the place you stored it originally, but we’re going to create a reference to the new one in a second anyway.
To update it, right click the icon or name and click ‘Delete’. It’s not going to do anything drastic – your code might go a bit crazy with the red squiggly lines, though – but we’re just making room for the new reference file.
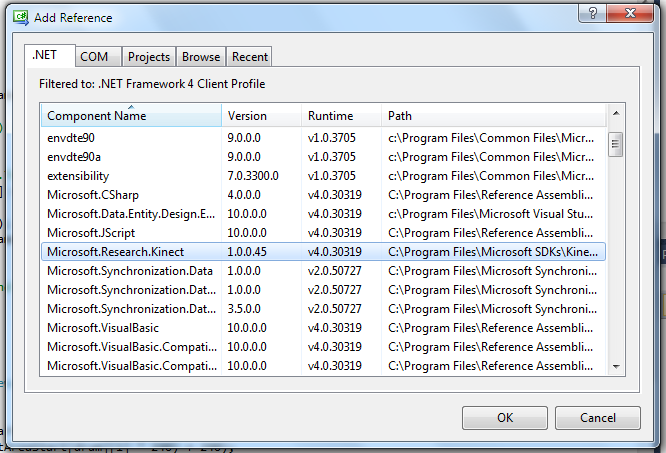
As I’m sure you did before, you need to add your reference file in again. It’s exactly the same as how you added it before, just make sure the version number is 1.0.0.45 (or, indeed, *not *the version number of Beta 1 or the original Beta).
Coding4Fun should be added at this point, too. Although it might not have a difference version number. Browse for it’s location, or if you saved the new one over the old one, select it from your Recent tab.
Updating code
Like I said previously, your code should continue to run fine regardless. But to take advantage (or allow us too easily in the future) of some of the key improvements in Beta 2, there’s a bit of rejigging that needs to happen.
//Kinect Runtime
Runtime nui;
This is our new way of referencing the nui runtime. Runtime nui = new Runtime(); still works, but is depreciated. The reason for this is because Beta 2 now allows easier use of multiple Kinect sensors on one computer, as well as the ability to preserve runtime after uninitializing it. If you’re only ever going to use one sensor in your application, you can hardcode nui = Runtime.Kinects[0]; as you please, but the sample applications have a new way of setting up the development environment.
private void SetupKinect()
{
    if (Runtime.Kinects.Count == 0)
    {
        this.Title = "No Kinect connected";
    }
    else
    {
        //use first Kinect
        nui = Runtime.Kinects[0];

        //setup event handlers
        nui.VideoFrameReady += new EventHandler<ImageFrameReadyEventArgs>(nui_VideoFrameReady);
        nui.DepthFrameReady += new EventHandler<ImageFrameReadyEventArgs>(nui_DepthFrameReady);

        //Initialize to return both Color & DepthAndPlayerIndex images
        nui.Initialize(RuntimeOptions.UseColor | RuntimeOptions.UseDepthAndPlayerIndex);

        //open both streams
        nui.VideoStream.Open(ImageStreamType.Video, 2, ImageResolution.Resolution640x480, ImageType.Color);
        nui.DepthStream.Open(ImageStreamType.Depth, 2, ImageResolution.Resolution320x240, ImageType.DepthAndPlayerIndex);
    }
}
SetupKinect() is a function that, when called, does the job you probably did in Window_Loaded() previously. Through putting it in it’s own function though you are able to run it when a new Kinect is plugged in, or the previous one has been plugged back in. So it shouldn’t need to churn through another Runtime when plugged in, and also not crash. That’s quite important.
This function can be expanded so that it does things for each Kinect sensor installed. Runtime.Kinects[] stores a reference to each sensor. Just loop through that.
Replace the event handlers and such from your Window_Loaded() method with SteupKinect() and you’re on your way.
Wrap up
There’s tonnes more out there with the Kinect SDK, not just updated in Beta 2. If I come across something particularly useful that I’m able to explain, then you’ll be the first to know!
Follow my development… developments on Twitter @stupler and you’ll see where I’m at with my Kinect work there. Safe coding. :)


