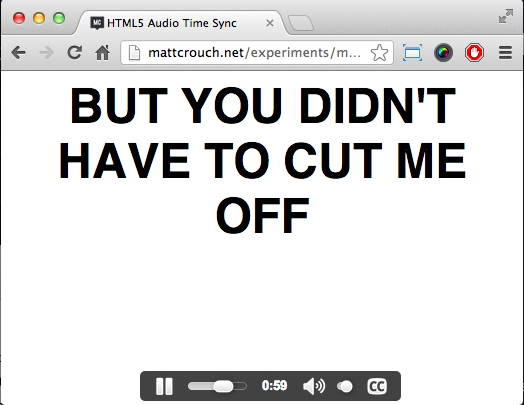
It’s Christmas, so I decided to look into something different. While most people were off playing their new computer games, I was have a (long delayed) play around with the new audio element in HTML5.
Never really being a Javascript person, I just sort of avoided it. But nowadays if I want to get anything done nicely, you kind of need it. Thought I would start off with a bit of a play, specifically with the track element.
What is the track element?
It’s a fairly new element (that is, not a lot of browsers have properly implemented it yet) which serves as a sort of subtitling service for audio and video tags. You supply content and a to and from timecode and the page will process those bits at that time. It’s stupidly simple.
It’s not just subtitles, you can use it as audio description for screen readers, it helps search engines index the multimedia content on your page, and it doesn’t always have to be text alongside the timecode, you can store things like JSON, too.
Example
I knocked up a bit of an example as to what track does. In a supported browser*, it will play an MP3 and the lyrics to the start of that infamous Gotye song alongside it.
*at this time of writing, the newest stable Chrome, Safari or Opera. Firefox will do track, but because the audio is only in MP3 format, it won’t play it.
Usage
Implementation of track is simple. You just pull out the contents of each timecoded segment through JS and stick it on the page somewhere to format as you please.
To link tracks to your audio or video, it’s just a case of adding a track element for each one.
<audio autoplay controls>
	<source src="song.mp3" type="audio/mpeg">
	<track src="track.vtt" label="English subtitles" kind="subtitles" srclang="en" default></track>
	Your browser does not support the audio element.
</audio>
track can take a few parameters:
- kind - “subtitles”, “captions”, “descriptions”, “chapters” or “metadata” - Key differences being ‘subtitles’ are for spsections, ‘captions’ for anything drowned out by other noise, ‘descriptions’ for when vision (in a video context) is obscuring another event, ‘chapters’ and ‘metadata’ more for aiding the experience on-site, to allow skipping or other functions on screen at these trigger points.</li>
- label - A selectable name for future inclusion in browsers
- default - When more than one
trackis defined, choose this one by default - src - The source of the timecodes, in .vtt format currently.
- srclang - Only required for the ‘subtitles’ kind; 2-letter language designation of the subtitles.
.vtt Files
At the moment, track files are ran only by WEBVTT files, with the extension of .vtt. They follow a strict, but simple format:
00:00:00.000 --> 00:00:05.141
Now and then I think of when we were together

00:00:07.509 --> 00:00:12.821
Like when you said you felt so happy you could die
They contain a from and to timestamp, separated by an arrow. It must be in the format HH:MM:SS.mmm. Miss any part of that line off and the entry will not be tracked.
The line below it is essentially free-reign. For example, it could contain JSON information on a particular picture to accompany a section of video or audio. For subtitles, and in this examples case, it needs to be plain text. Bear in mind that any line-breaks will be translated into the output, so long as each coded section has a clean break between each one.
You can have more than one section at a time. Two sets of timecodes can overlap, so long as they’re defined as the one starting first is written first. The order they’re in is strict. The wrong way around and they won’t render correctly, if at all.
Accessing the cues
From here, accessing active cues is pretty easy. If we find our audio element and assign it to the variable ‘audio’, we can access a bunch of things about that audio object, like its text tracks.
audio.textTracks[0].oncuechange = function (){}This is getting the first textTrack - the first track element - inside our audio element. Obviously, if you have got more than one you can iterate over it.
Within this is a property called ‘activeCues’. This is an incredibly handy property, which contains all the cues that should be shown at the current time of the audio. We can iterate through this and get every one at the current time. As this is on a cue change - either one starting or one ending - there’s no need for you to manually add/remove certain elements.
if(this.activeCues !== null) {
  for(var i=0; i < this.activeCues.length; i++) {
    if(this.activeCues[i] !== undefined) {
     $("#output").append(this.activeCues[i].text + "<br/>");
    }
  }
}
Firstly we’re checking if we have any active cues whatsoever, as this would throw our for loop off on a pointless exercise. But then, for each entry in activeCues, put that text on screen. We check for undefined as it was throwing up errors for different, seemingly random cues.
That’s it, really. The hard bit then is getting your .vtt file lined up appropriately.
It’s a great bit of tech, but the only problem being it’s not properly implemented yet. Should see some good, and creative, things with this in the future.
